This is especially true in India DIY grooming is rising, and you can safely and cheaply improve your natural brows from the comfort of your own home if you do it the right way. This method is more about getting soft, well-defined results than harsh or too dark brows. Even if you’ve never done it before, you can get a neat, well-groomed eyebrow look by following a simple step-by-step guide and using products easy beginners to use.
Easy Eyebrow Tinting at Home
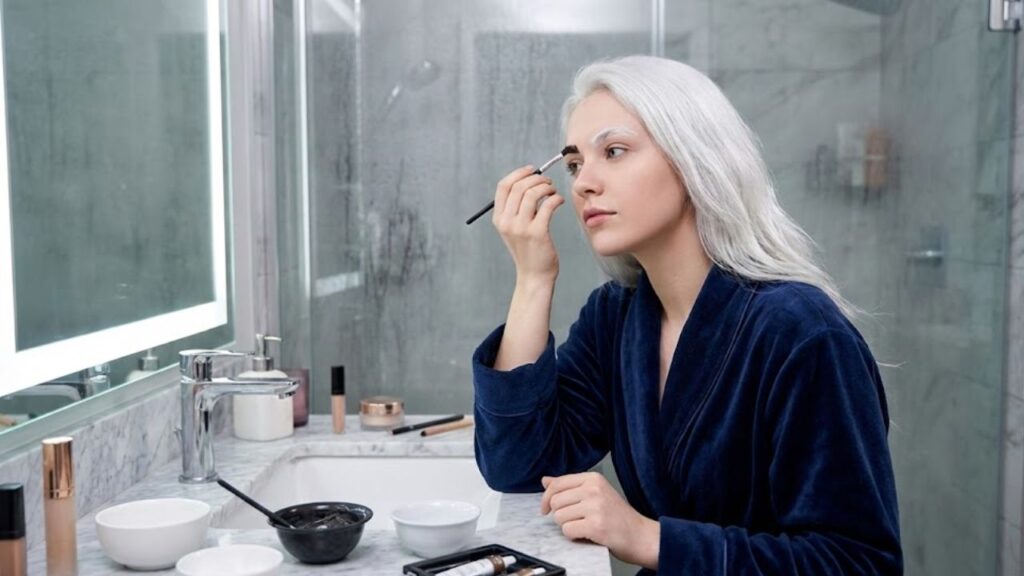
Beginners’ guide to tinting eyebrows at home
The first step to successfully tinting your eyebrows at home is to learn the basics. Picking a colour close natural brow colour will help you avoid big mistakes and keep your eyebrows looking natural. Always do a patch test first to make sure your skin is safe and to lower the risk of irritation. When your brows are clean and free of oil or makeup, the tint will stick evenly, which will make the colour look smoother. To keep your brows soft and natural-looking, use as little product as possible and follow the timing instructions closely. These basic steps make beginners feel more at ease before they start applying.
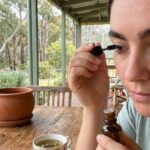
How to tint your eyebrows at home, step by step
A clear method makes the process less scary. To protect the skin around your brows and make the edges of your brows look clean, start by outlining them with petroleum jelly applied. Follow the instructions to mix the tint, then use a small angled brush to apply it evenly. Start at the tail and work your way forward, leaving less coverage near the inner brow to keep the depth of the brow even. Set a timer and keep a close eye colour changes to avoid staining. When the time is up, gently wipe off with a damp cotton pad to show brows that are evenly tinted but still look natural.
Keeping your brows soft and defined after tinting
Your tint will last longer fade evenly if you take care of it properly. Don’t wash your face for at least 12 hours after getting the tint. This will help it last longer. To keep the colour in use, use gentle, sulfate-free cleansers around the brow area. Using a light brow oil or serum can help nourish hair and encourage healthy brow growth. To avoid dryness or damage, you should space out touch-ups. This will keep your look consistent low-maintenance grooming routines that work with busy lives.
 Jennifer Aniston Credits a 30 Minute Fitness Class for Maintaining Strength, Energy and Lean Muscle
Summary and useful things to remember
Anyone who wants well-defined brows without having to go to the salon can easily tint their eyebrows at home. When done right, it gives you full control shade and intensity while also being cheap and good for your skin. The secret is to get ready patient and follow the instructions carefully to avoid making mistakes. You can get polished daily brows that look good on your face by focusing on small improvements instead of big changes. With regular care careful touch-ups, this simple routine can become a dependable part of your grooming routine.

| Aspect | Recommended Practice | Benefit |
|---|---|---|
| Choosing a shade | Match the colour of your natural brows | Soft, real-looking finish |
| Testing a patch | 24 hours before use | Less chance of irritation |
| Time to apply | 5 to 10 minutes | Depth of colour control |
| Care after | Don’t wash face 12 hours | Results that last longer |
| Taking care of | Retint every 3 to 4 weeks | Consistent look for brows |
Questions that people often ask
- Is it safe to tint your eyebrows at home?
Yes, but only if you follow directions carefully and do a patch test first. - How long does eyebrow tint usually stay on?
Depending on your skin type care, most tints last between two and four weeks. - Can beginners tint eyebrows at home?
Yes, beginner kits and easy methods perfect for people who are new to it. -
What to do if eyebrows get too dark?
Gently wash the area and give it days to fade on its own.