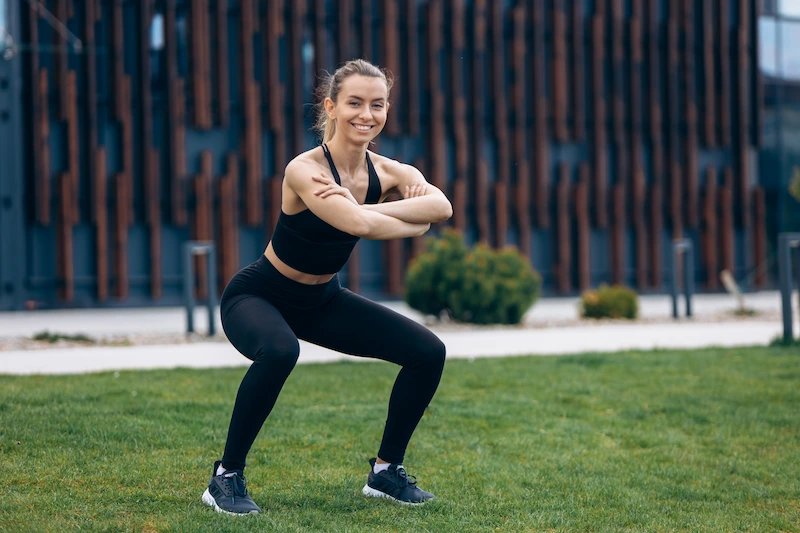
Performing a 1-minute plank every day is an efficient, low-commitment way to develop core strength. The key is focusing on form, not duration. Many beginners have embraced this practice not because planks have become easier, but because there’s a growing understanding of proper technique and progressive training.
Start with 20-30 seconds on your forearms. Maintain a straight line from head to heels, engage your core and glutes, and avoid common errors like sagging hips or holding your breath. If you cannot hold it for the full time, break it into sets. Consistency is more important than perfection.
About the 1-Minute Daily Plank
The 1-minute daily plank is a minimalistic core exercise where individuals hold a static position—usually a forearm or high plank—for 60 seconds every day. The aim isn’t maximum intensity but forming a sustainable habit that promotes gradual strength development. This exercise is ideal for those who have limited time or access to equipment, as it fits into short breaks during the day, such as after brushing your teeth or during a midday stretch.
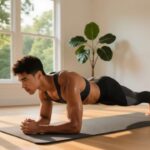
It’s perfect for beginners, individuals recovering from a sedentary lifestyle, or those looking to improve their functional fitness without the need for a gym. The focus is on neuromuscular coordination, postural stability, and core engagement in daily movements.

Why the 1-Minute Daily Plank Is Popular
The rise in micro-workouts—short, repeatable exercises—aligns with the 1-minute plank. People are looking for manageable habits that add up over time, rather than dramatic changes overnight. The plank has become a symbol of simplicity and effectiveness, especially as home fitness and bodyweight exercises grow in popularity.
In addition, access to clear, science-based guidance via YouTube and wellness blogs has lowered the intimidation factor for beginners. The lack of required equipment makes this exercise accessible to everyone—no need for shoes, gear, or subscriptions.
Approaches and Variations
There are several plank methods, each suited for different fitness levels and conditions.
| Approach | Best For | Advantages | Potential Issues |
|---|---|---|---|
| Forearm Plank | Beginners, joint sensitivity | Less wrist strain, easier to maintain alignment | Can encourage hip sag if core disengaged |
| High Plank (on hands) | Those with wrist strength | Mimics push-up position, builds shoulder stability | Wrist discomfort possible; harder balance |
| Knee Plank (modified) | Very early stages, mobility limitations | Reduces load while teaching form | Risk of poor posture if knees splay or hips rise |
| Progressive Timing (e.g., 3x20s) | All beginners | Builds endurance gradually, prevents burnout | Requires tracking; may feel less “complete” |
Key Features to Focus On
When assessing the effectiveness of your plank practice, concentrate on measurable criteria:
- Body Alignment: Keep a straight line from head to heels. Use a mirror or record yourself.
- Core Engagement: Feel tension in your abdominal muscles, not just fatigue in your arms or shoulders.
- Glute Activation: Squeeze your glutes to stabilize the pelvis and protect your lower back.
- Breathing Pattern: Maintain steady, rhythmic breaths. Holding your breath indicates strain.
- Hold Duration Progression: Increase your time by 5-10 seconds each week until you reach 60 seconds.
Pros and Cons of the 1-Minute Daily Plank
Pros:

- Requires no equipment or space.
- Improves posture and spinal alignment.
- Enhances core stability, which supports daily movements.
- Can be done anywhere, anytime—perfect for habit stacking.
- Low risk when performed correctly.
Cons:
- Plateaus quickly without progression or variation.
- Can cause wrist or shoulder discomfort if form breaks down.
- Not sufficient for full-body fitness.
- Risk of reinforcing poor mechanics if practiced incorrectly.
How to Choose Your Plank Approach
Follow these steps to determine the right plank method for you:
- Assess Your Starting Point: Try holding a forearm plank as long as possible with good form. Note the time.
- Select Modification Level: If you can’t hold it for 20 seconds, start with knee planks or 3 sets of 15–20 seconds.
- Focus on Form: Elbows should be under shoulders, body straight, core tight, and gaze neutral.
- Schedule It: Attach the plank to an existing habit, like after brushing your teeth or before coffee.
- Track Progress: Aim to increase hold time by 5–10 seconds each week.
- Reassess Monthly: Test your progress by attempting a 60-second hold every 4 weeks.
Cost Analysis
The 1-minute daily plank costs nothing in terms of membership, apps, or equipment. However, optional tools can improve your practice:
- Mirror or phone camera: For visual feedback on form ($0–$1000 depending on device).
- Exercise mat: For cushioning your elbows and knees ($15–$40).
- Fitness tracker or timer app: Track time and progress (free–$10/year).
The real cost is time. At 60 seconds per day, the annual time investment is only 6 hours, offering high return on investment for minimal disruption.
Better Solutions & Competitor Analysis
Some alternative routines offer broader benefits once you master the 1-minute plank:
| Solution | Advantages | Potential Drawbacks | Budget |
|---|---|---|---|
| Plank Variations (side, reverse, dynamic) | Targets obliques, glutes, anti-rotation control | Higher skill requirement, injury risk | $0 |
| Core Circuit (plank + bird-dog + dead bug) | Better motor control and functional carryover | Takes 10+ minutes; harder to maintain | $0 |
| Guided Home Programs (apps or videos) | Structured progression, motivation, form checks | Subscription fees ($5–$20/month) | $0–$20/mo |
Customer Feedback
The 1-minute daily plank receives positive reviews when expectations are realistic. Users appreciate the simplicity and effectiveness of the practice.

Conclusion
If you want a simple, time-efficient way to improve core stability and awareness, the 1-minute daily plank is a great option. Focus on proper form, progress gradually, and pair it with other exercises for full-body fitness.